
Your first no-knead loaf will probably be disappointing. Mine was. I pulled a pale, flat disc out of the oven, sliced it, and got something closer to a dense cake than bread. I had done everything "right" — mixed four ingredients, waited, baked. So why did it fail?
Because the no-knead bread baking method is not a shortcut. It is a different way of building gluten, and it only works when you understand what the long fermentation is actually doing. Once you get that, the loaf changes completely. Here is what I learned after dozens of attempts, including the ones that went straight into the bin.
Key Takeaways
- No-knead bread replaces mechanical kneading with time and moisture: a long, slow fermentation develops the gluten network for you.
- The classic ratio is roughly 100 parts flour to 75 parts water by weight, with a tiny amount of yeast and about 2% salt.
- Baking happens hot — 230 to 250°C (450–480°F) — ideally in a covered Dutch oven that traps steam.
- Dense crumb almost always traces back to under-fermentation, weak flour, or too little hydration.
- An overnight rise is not only possible, it is the whole point. Twelve to eighteen hours at cool room temperature is the sweet spot.
How no-knead bread actually works
Kneading does two things: it hydrates the flour evenly and it aligns gluten proteins into a stretchy network. That network is what traps the gas your yeast produces. Without it, you get a brick.
Here is the trick the long fermentation pulls off. Given enough time and water, gluten proteins link up on their own. Flour particles absorb water completely, enzymes get to work, and the dough essentially kneads itself at a molecular level. You are outsourcing the labor to chemistry.
Why time replaces muscle
The trade-off is that you need a lot of time. Not active time — you can walk away — but elapsed time. Twelve hours minimum in most kitchens, and closer to eighteen if your room is cool. I tried rushing a batch at six hours once, out of impatience. The result was a loaf with a tight, gummy interior that tasted like raw flour. Lesson learned the hard way.
The hydration factor
No-knead dough is wet. Much wetter than what you would knead by hand. The classic proportion sits around 75% hydration — 750 grams of water for every 1000 grams of flour. That extra water keeps everything mobile enough for the gluten to organize itself, and it produces the open, airy crumb people associate with artisan bread.
Go below 65% and the whole method starts to fall apart. The dough is too stiff to develop structure on its own.
The basic ratio and process, stripped down
You do not need a recipe with twelve steps. You need a ratio and a rhythm.
| Ingredient | Amount (baker's percentage) | What it does |
|---|---|---|
| Bread flour | 1000 g (100%) | Base; higher protein means stronger gluten |
| Water | 750 g (75%) | Hydration for gluten development and open crumb |
| Salt | 18–20 g (≈2%) | Flavor and gluten tightening |
| Instant yeast | 2–3 g (≈0.25%) | Slow gas production over many hours |
That is it. Four ingredients, one bowl, one spoon. The low yeast quantity matters — this is not a typo. Too much yeast and the dough exhausts its sugars and collapses before you bake it.
The mixing and the wait
Stir everything together until no dry flour remains. It will look shaggy and wrong. Cover the bowl and leave it alone for 12 to 18 hours at room temperature — around 18 to 21°C is ideal. Below 17°C, everything drags; above 24°C, the fermentation runs too fast and tastes sour and boozy.
Shaping and the second rise
Turn the dough out onto a floured surface. Fold it over itself a few times — this is where you build surface tension. Shape it into a round, place it on parchment, and let it rest for 1 to 2 hours while your oven preheats. A cold retard in the fridge overnight also works and improves flavor noticeably; I do this on weekends when I have the patience.
What are the pros and cons of no-knead bread?
The main advantage is effort, not time. Your hands-on work drops to maybe fifteen minutes total. The main drawback is unpredictability: because you are relying on ambient conditions rather than a fixed schedule, two batches can turn out noticeably different.
- Pro: Almost no active labor, and no stand mixer required.
- Pro: Deep, complex flavor thanks to the slow fermentation.
- Pro: Forgiving of a slightly missed schedule — an extra hour rarely ruins anything.
- Con: You must plan a day ahead, minimum.
- Con: Less control over timing and crumb structure than a kneaded dough.
- Con: The original 2006 recipe, popularized by Jim Lahey and Mark Bittman, has a reputation among experienced bakers for a slightly bland, flat-tasting crumb. Fixable, but it takes tweaks.
My honest verdict: if you bake twice a week and love precision, kneading gives you more control. If you bake occasionally and want good bread with minimal fuss, no-knead is the better tool.
At what temperature is no-knead bread typically baked?
Hot: 230 to 250°C (450–480°F). Most recipes settle around 240°C.
The reason is oven spring. A very hot oven causes the trapped gases to expand violently in the first few minutes, before the crust sets. That is what gives you volume rather than a flat pancake.
Why the Dutch oven matters
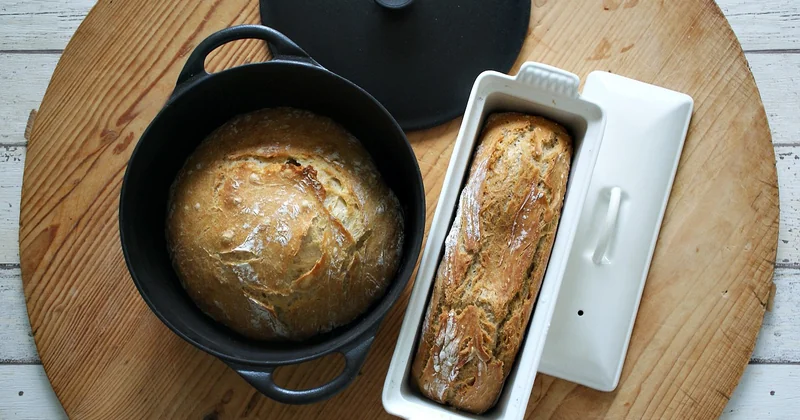
A covered pot traps steam. Steam keeps the crust soft long enough for the loaf to fully expand, then you uncover it to brown and crisp. I baked without a Dutch oven for months and wondered why my crust was always leathery. The moment I borrowed a cast-iron pot, the difference was obvious: taller rise, crackling crust, better crumb.
No Dutch oven? Use any heavy pot with a lid, or bake on a preheated stone with a tray of water underneath. Both work — just expect a bit less spring.
Why is my homemade no-knead bread so dense?
Almost always one of three culprits: under-fermentation, weak flour, or too little water. Here is how to tell them apart.
Diagnosing the dense loaf
- The dough barely rose. Your kitchen was too cold, or your yeast was dead. Test yeast in warm water first if you suspect it.
- It rose, but the crumb is tight and heavy. Likely low-hydration dough or all-purpose flour with modest protein. Switch to bread flour and nudge the water up.
- Big tunnels plus a gummy bottom. That is underbaking, not under-fermentation. Give it ten more minutes with the lid off.
- Sour, sharp, collapsing flavor. Over-fermented. The gluten has broken down. Shorten the rise next time.
I wasted a full month blaming my oven before realizing my flour was the problem. Swapping to a higher-protein bread flour fixed eighty percent of my issues overnight.
Can you leave no-knead bread to rise overnight?
Yes — that is exactly how the method is designed to work. Mix in the evening, bake the next day.
An overnight rise of 12 to 18 hours at room temperature is the standard. If you want to stretch it further, put the bowl in the fridge: a cold ferment can run 24 to 72 hours and actually improves flavor, at the cost of a longer final proof.
What to watch for
Dough is ready when it has doubled, looks bubbly on the surface, and jiggles slightly when you shake the bowl. If it has collapsed and smells strongly of alcohol, you waited too long. Fold it back together, bake it anyway, and call it a learning loaf. I have eaten plenty of those.
The upgrades worth making
The classic recipe works. It is also a starting point, not a finish line. A splash of vinegar or a spoonful of beer in the water deepens the flavor. Swapping 10% of the flour for whole wheat adds complexity. A short pre-ferment — mixing a small portion of flour, water, and yeast the night before — pushes the taste noticeably further.
None of this is required. But once the basic method clicks, these are the moves that turn a decent loaf into one you want to show people.
Bread is forgiving. That is the part nobody tells you. The failures teach faster than the successes, and the fourth loaf is always better than the first. So mix a bowl tonight, leave it on the counter, and see what happens by morning.